Feb 29, 2012

Linky Follower Blog Hop!

This is my very first Blog Hop! Hooray for that!!! :D

You have probably heard Google Friend Connect (GFC) is leaving for non-Blogger blogs. There's also
a rumor floating around that it will be gone for Blogger blogs soon enough.

But, not to worry!

You might have seen Linky Followers floating around the Blogosphere lately. I have my own linky tool in the sidebar! This is a great tool for following blogs and knowing their latest updates! And, it's FREE. Yep! To participate in this blog hop, you must have a Linky Followers Tool somewhere on your blog.

This is the:
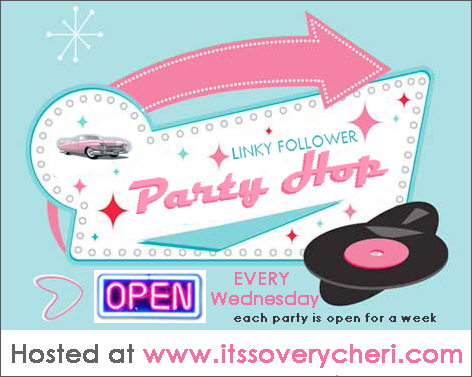

Time to link up!!!


Rules:

#1. You must have a Linky Followers tool on your website to participate.
Please be sure that you have this! If you do not, your link will get deleted. If it is, make sure you add the tool
to your blog, then come back and re-enter your blog. (Linky Followers is FREE! You can have both GFC and Linky Followers on your blog.)

#2. You must follow the blog who as their party on their site. 
Thanks for following me!


#3. Just simply link up your blog URL (your homepage, not a specific post) below...


#4. Then grab the blog hop code under the 'what is a blog hop?' link. When you link up, make sure you are in HTML view/mode. (For bloggers, there are tabs and one says Edit HTML. Choose that one) Place the code BEFORE the last <div> for the Party Hop to work!


#5. Please check out other links and follow as many blogs as you like! Spread some comment <3 and let them know you are following them (If you would like to, include you came from A Creative Cookie)


Please make sure you have followed all these rules. You can get the Linky Followers code HERE for free! Simply insert the Linky Followers code in the side bar (using an HTML gadget or something similar) and you are done!


Remember, this is to help build up followers for blogs! Please don't be a link-and-run blogger!


I will visit as many links as I can and follow my favorites!


Thank you in advance for linking up!


Still need help? Go here.

Happy Leap Day!

Since Leap Day only occurs every four years, today will be our ultimate Leap Year guide!


Feb 27, 2012

(Disabling) Word Verification Comments (for the 'old' Blogger interface)

Don't you hate it when you leave a comment and you see this?
I've created a quick (and amazingly easy!) tutorial on how to disable this feature. But first...

The reasons you should disable word verification:
You might be losing comments. 
Your readers might write a comment then, unknowingly, leave the page without realizing there was another step to commenting

It takes a lot longer with word verification
Leaving a comment is a two-step process. It takes a while. (especially with a slower computer)

The pictures are hard to read
I hate it when the photos are difficult to read, then I end up taking forever leaving a comment because I keep getting it wrong.

All these things could lead up to readers who won't leave comments.
Also, you should know,
I've never had any trouble with spam (ever since I started 'no verification' comments), but you should check your spam box every week or so.
I also have my comments set so I moderate them by email whenever someone leaves a new comment.

Now, onto disabling this feature!
It's super simple and easy!

Feb 25, 2012

Monster Mash Party Reveal!

I had this party eons ago, I just never got to posting it!

Today's the lucky day I reveal it! Have fun browsing these 'scary' fun ideas!

1. Monster Cupcakes
Inspired by these monster cupcakes, I had fun with different pipes and colors. To make the eye,
all you have to do is cut off the corner of a marshmallow then stick on a Junior Mint! These were super easy. For the last cupcake, I did stripes of all three colors. That was the cupcake that went on top of the cupcake tree.

2. Monster Pop-Ups (prizes/party favors)
Bought from here at $4.00/dozen! This place, Oriental Trading, has great party supplies and crafts for kids!!!
I used these Monster Pop-Ups as prizes (winners get first pick), but they are awesome as favors as well!

Feb 24, 2012

Ombre Napkin Ring (from tape dispenser roll!)

This project costs practically nothing, since the actually napkin ring is made from your trash. More specifically, the plastic tape roll inside the tape dispenser!

This is a great ombre project! In case you aren't familiar with the definiton of ombre, you can find it right here.

Supplies:
One plastic ring tape dispenser (I seriously have no idea what to call them - tape rolls?)
about 3-6  long pieces of embroidery floss in one general color, ranging from light to dark
scissors
a bit of glue

 Start with the tape dispenser roll...

Feb 23, 2012

Five Things Friday #2 {Flowers}

Hi there!!! Sorry I haven't posted much lately - so busy!

Ok. Let's get started!
So excited for #2 of Five Things Friday!

This week's theme is


Rosette Hair Clip Tutorial
These Tea Time Feather + Rose clips are adorable! From The Mother Huddle.


The Crepe Paper Flowers from How About Orange are just too cute! I love their realistic look.

Feb 17, 2012

Five Things Friday #1 {Glitter}

 Welcome to my very first edition of Five Things Friday!

Every Friday, I'll have a post full of 5 different things/links/ideas/photos (in category) 

This week's theme is:

 Glittered Toadstool Tutorial
Aren't these Glittered Toadstools from Torie Jayne just adorable! I'm just in love with the colors!

Feb 14, 2012

Following

So I heard that Google Friend Connect is closing for Wordpress blogs! 
They've all worked hard (like all of us bloggers) to build up followers.

SO, who knows when they might shut down GFC for Blogger? I would hate to lose any followers,
so I've created multiple ways any ACC reader can follow!

Linky Followers
This has become popular among the Blogosphere! I've added a Linky Followers gadget in the side bar - I'd love if you would follow!

Facebook
Check out my FB page here. I'm constantly adding new post updates and ideas!

Google +
Same as Facebook, I'll be adding new post updates here as well. I admit i'm still figuring it all out, but I'm sure
we'll all become pros soon enough.

Pinterest
I post almost all my tutorials on my Pinterest. It's a great way to follow tutorial updates!

Email
I have a gadget in my sidebar that allows you to enter your email. Every time I post, the update appears
in your inbox!

You can find links to all of these in the right-hand sidebar.

Valentine's Day!


"Anyone can catch your eye, but it takes someone special to catch your heart."
-Unknown

Happy Valentine's Day!!!
<3

Feb 12, 2012

Cookie Monster Valentine Treat Bag

I know people generally focus on the Valentines for V-Day. But isn't the bag/box that holds the valentines
important too? ;) I made this cute Cookie Monster Treat Bag that would also make just an adorable gift bag/goody bag!
 Let's get started:

Supplies:
1 dark blue gift bag
Glue
Black, white, and brow paper
Black marker


 Start with bag...
 Glue on eyes (color white circles with marker), mouth (big, curved black paper shape), and cookie (partly folded brown circle with marker choco-chips).

You're done! That was easy!


Happy (two-day-early) Valentine's Day!

xo. Kate

Blog Organization

I need to organize my blog posts and ideas. What I've previously been doing is keeping stapled pages of all my ideas. I never thought about organizing my blog posts until I read this from The Letter 4 blog.
It has changed my view on blogging... and inspired me!
Creativity can be unleashed!


 My cover - isn't it cute! I am in LOVE with that font!
I love the idea (recommended by The Letter 4) Elsie had. She covered a wall with all her ideas and thoughts!
(real-life Pinterest, anyone?) The Letter 4 put all their ideas on sticky notes!

My binder came with this plastic holder. The sticky notes + pen fit in perfectly!

The Letter 4 has their adorable printable! I created my own, because I don't have any sponsors yet.
Calendar + Notes Printable
This printable can be a little funky - on Google Docs, click 'Download Original'. You might have to
make a few simple changes, and you can personalize it if you like.

How do you organize your blog? I'd love to know!
xo. Kate

Feb 9, 2012

Nerd Monster Valentines

Hooray! Valentine's Day is almost here... and I have some super easy valentines to go with it!

Supplies:
Wonka Nerds boxes
Paper or craft foam
Tape
Glue
googly eyes (optional)

Start with some Nerd boxes...

 Cover the box with paper and tape in the back
 Glue on eyes and mouth. Now you can add a   To: From:   paper on the back.
Finished with the first monster!

Cookie Monster:
 Cover with paper or foam (I only had blue craft foam in 'Cookie Monster' color)
 Glue on eyes and mouth. Now make a cookie out of brown paper + marker. Fold one side down a bit and glue the flap to the mouth.

Done with monsters!
 You can make monsters from any square candy - candy heart boxes for example.
 Try testing out different characters: Spongebob squarepants would be easy (since he's square), other Sesame Street characters, or some animals (elephant, fish, dog, cat).
Happy Valentine's Day!!!


xo. Kate

Yarn Pot (completely made of yarn!)

So this yarn pot was kind of an experiment. It's a fun craft though and the outcome looks great!
Plus you can use any yarn to coordinate with room colors.

Supplies:
Yarn
Elmer's glue
Piece of cardboard

Start with your square of cardboard... (mine's rounded at the edges, but it doesn't really matter because
you're cutting the remains off anyway)

Feb 6, 2012

Pom Pom Party Series Part 3 - Pom Pom Earrings

And now for the third part of the Pom Pom Party Series!!!
Pom Pom Earrings!
I know, I know - I took FOREVER to get this post up. Sorry about that.

Ok, now lets get on to the tutorial. You will need:

Two pom poms of the same size + color (unless you want to go a little crazy with mis-matching earrings)
needle + thread
earring hooks

 Start by threading your pom pom. Once you come through, go back and make a loop

Now pull the thread from the other side of the pom pom and pull the loop in.
It will be hidden in the center of your pom pom, out of site.

Ok, since it's near Valentine's Day and all, I felt I HAD to take a picture of the shape the thread had made 
and share it with you. Totally unnecessary, but whatever. 
 Cut the thread that's left, long enough to tie a knot with it.

 Now slip one strand of the thread through the loop on the bottom of the earring hook...
 ...And knot! Trim off the excess thread and your DONE!

 Now go and make a ton of them, like I did!!!

If you missed the previous parts of the series, here they are:

 inspire. create.